
a year later
So here we are, ten months after the last post. I'm hesitant to say this, but I think the darkroom is genuinely close to being done. An update on what's happened with the little darkroom since July 2016:
- Laminate counters are down
- The outlet is in and working
- I got a free light box (always, always, always see if you can source out equipment and supplies before you buy them)
- I finally ordered trays and tongs
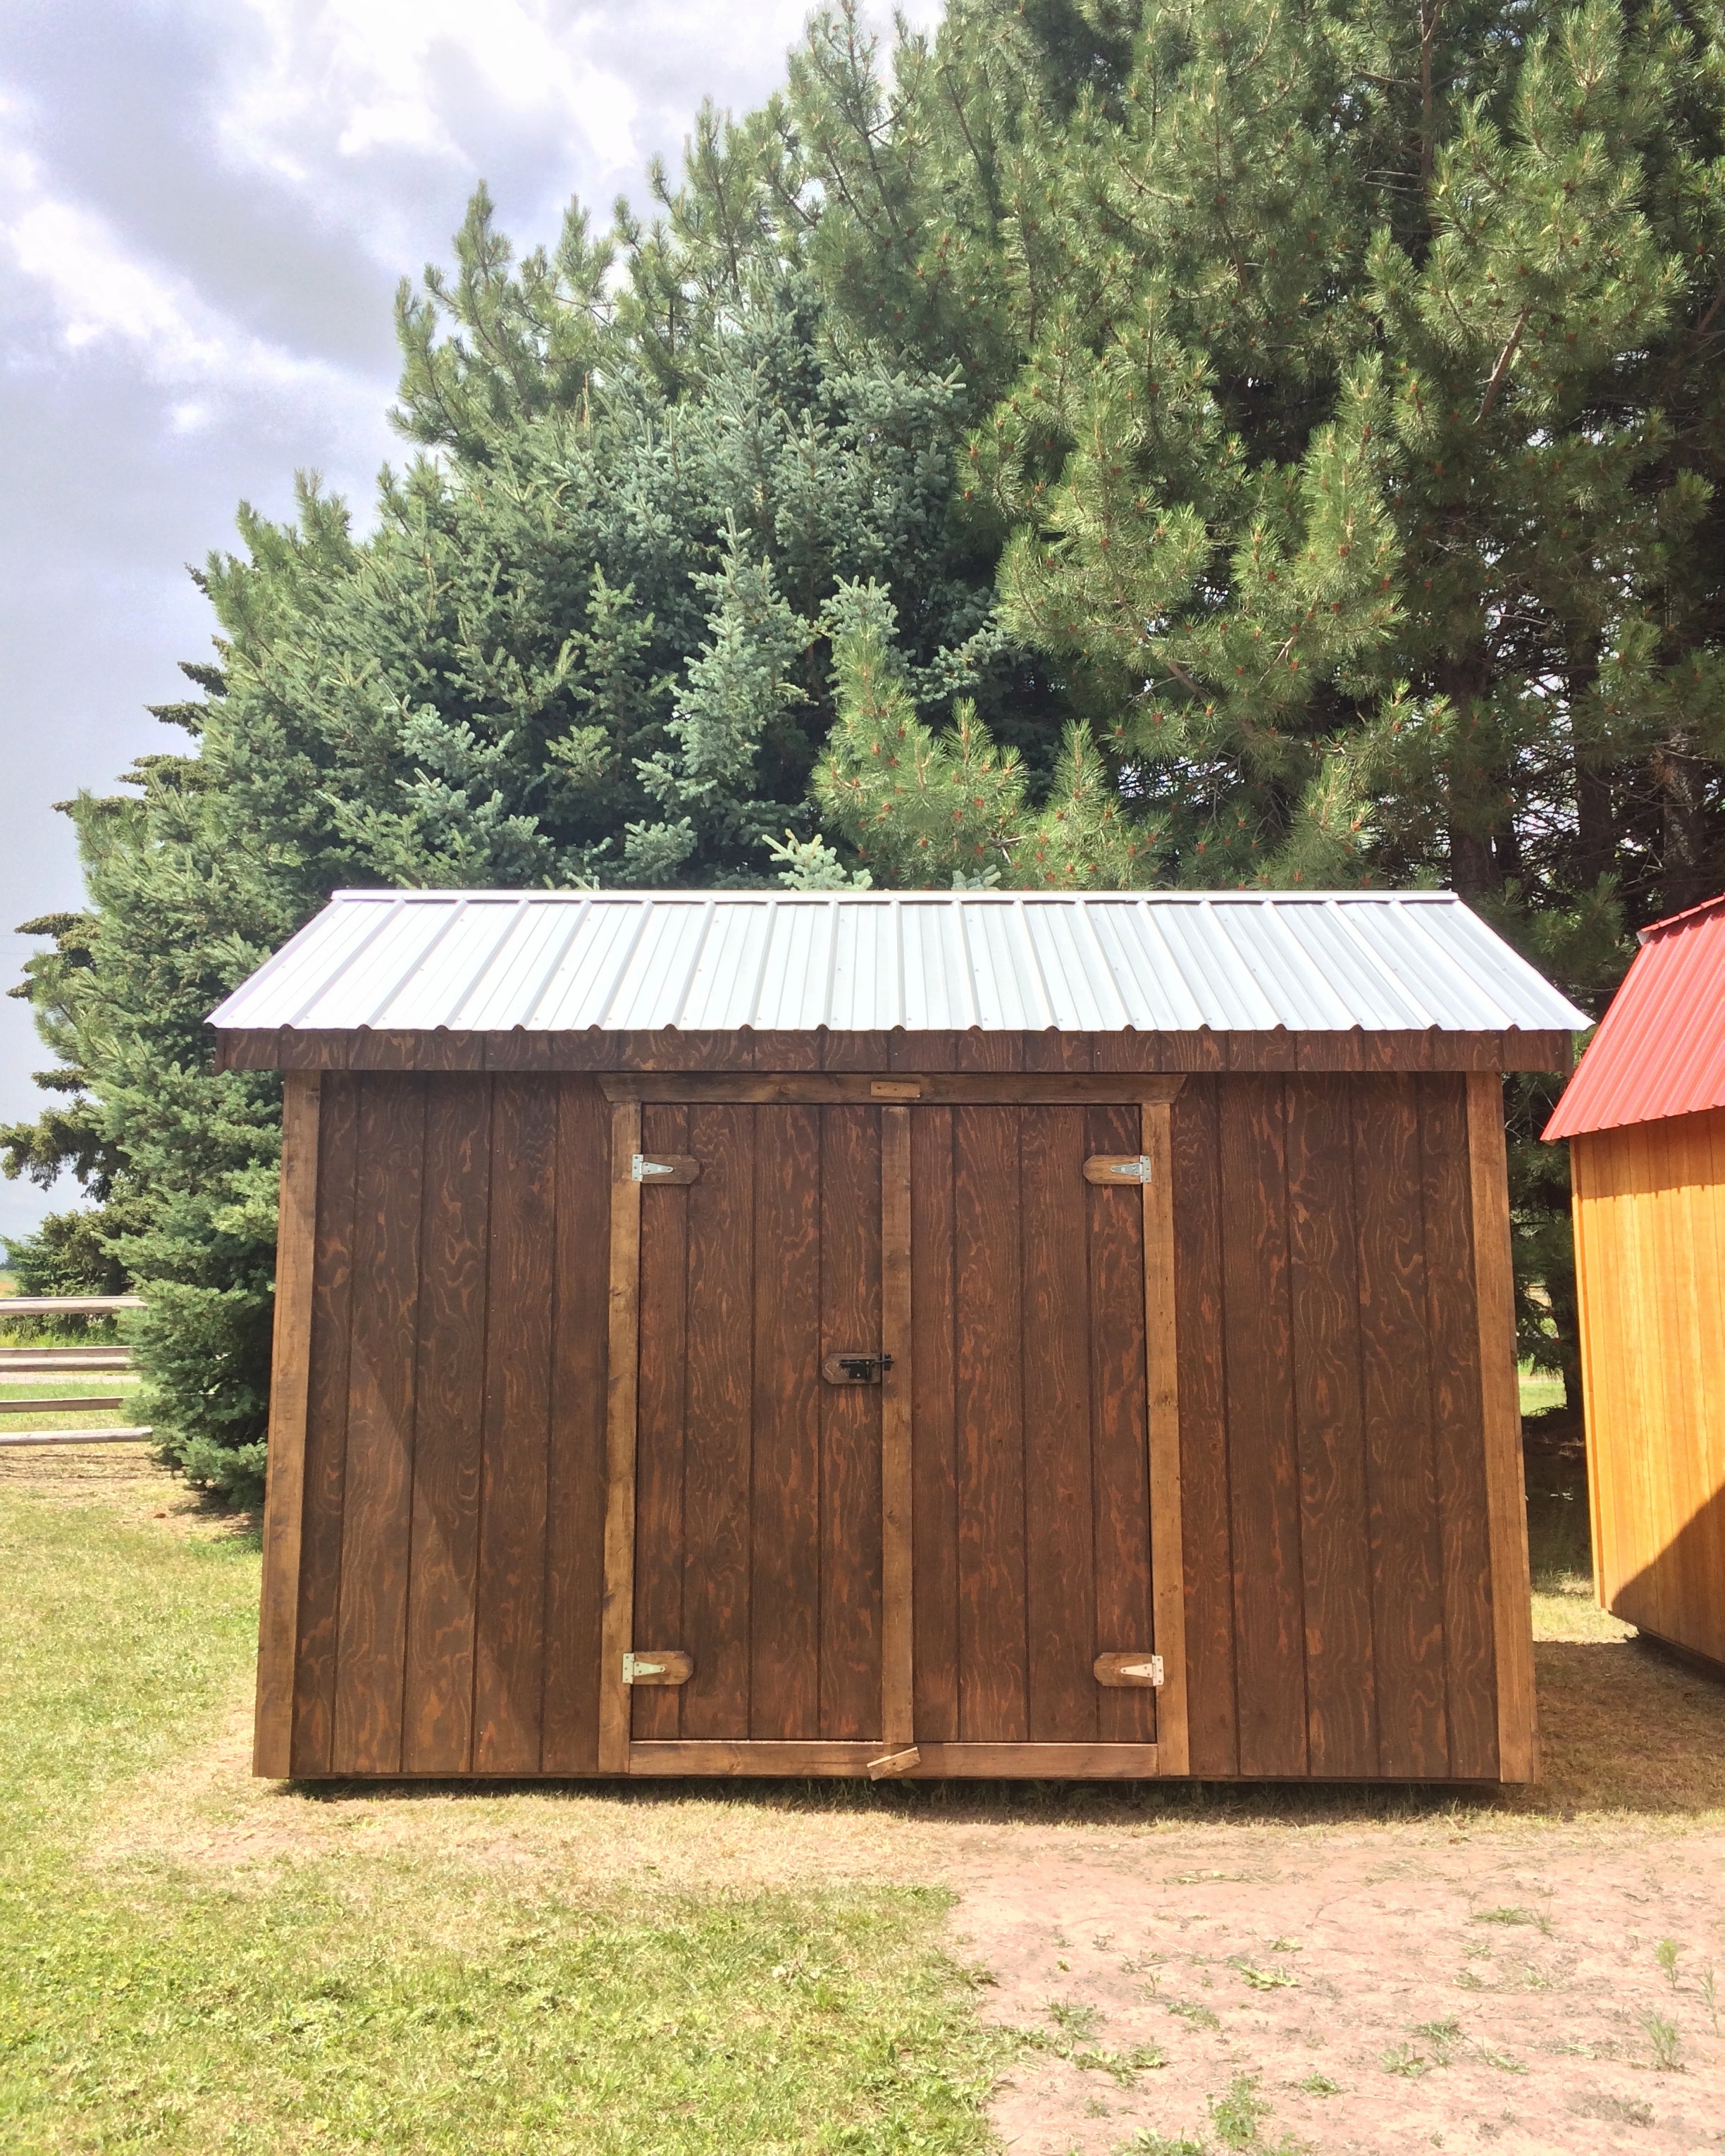
- I bought a contact printing frame (I know they're feasible to build, but with how I work it was probably easier/cheaper to buy one)
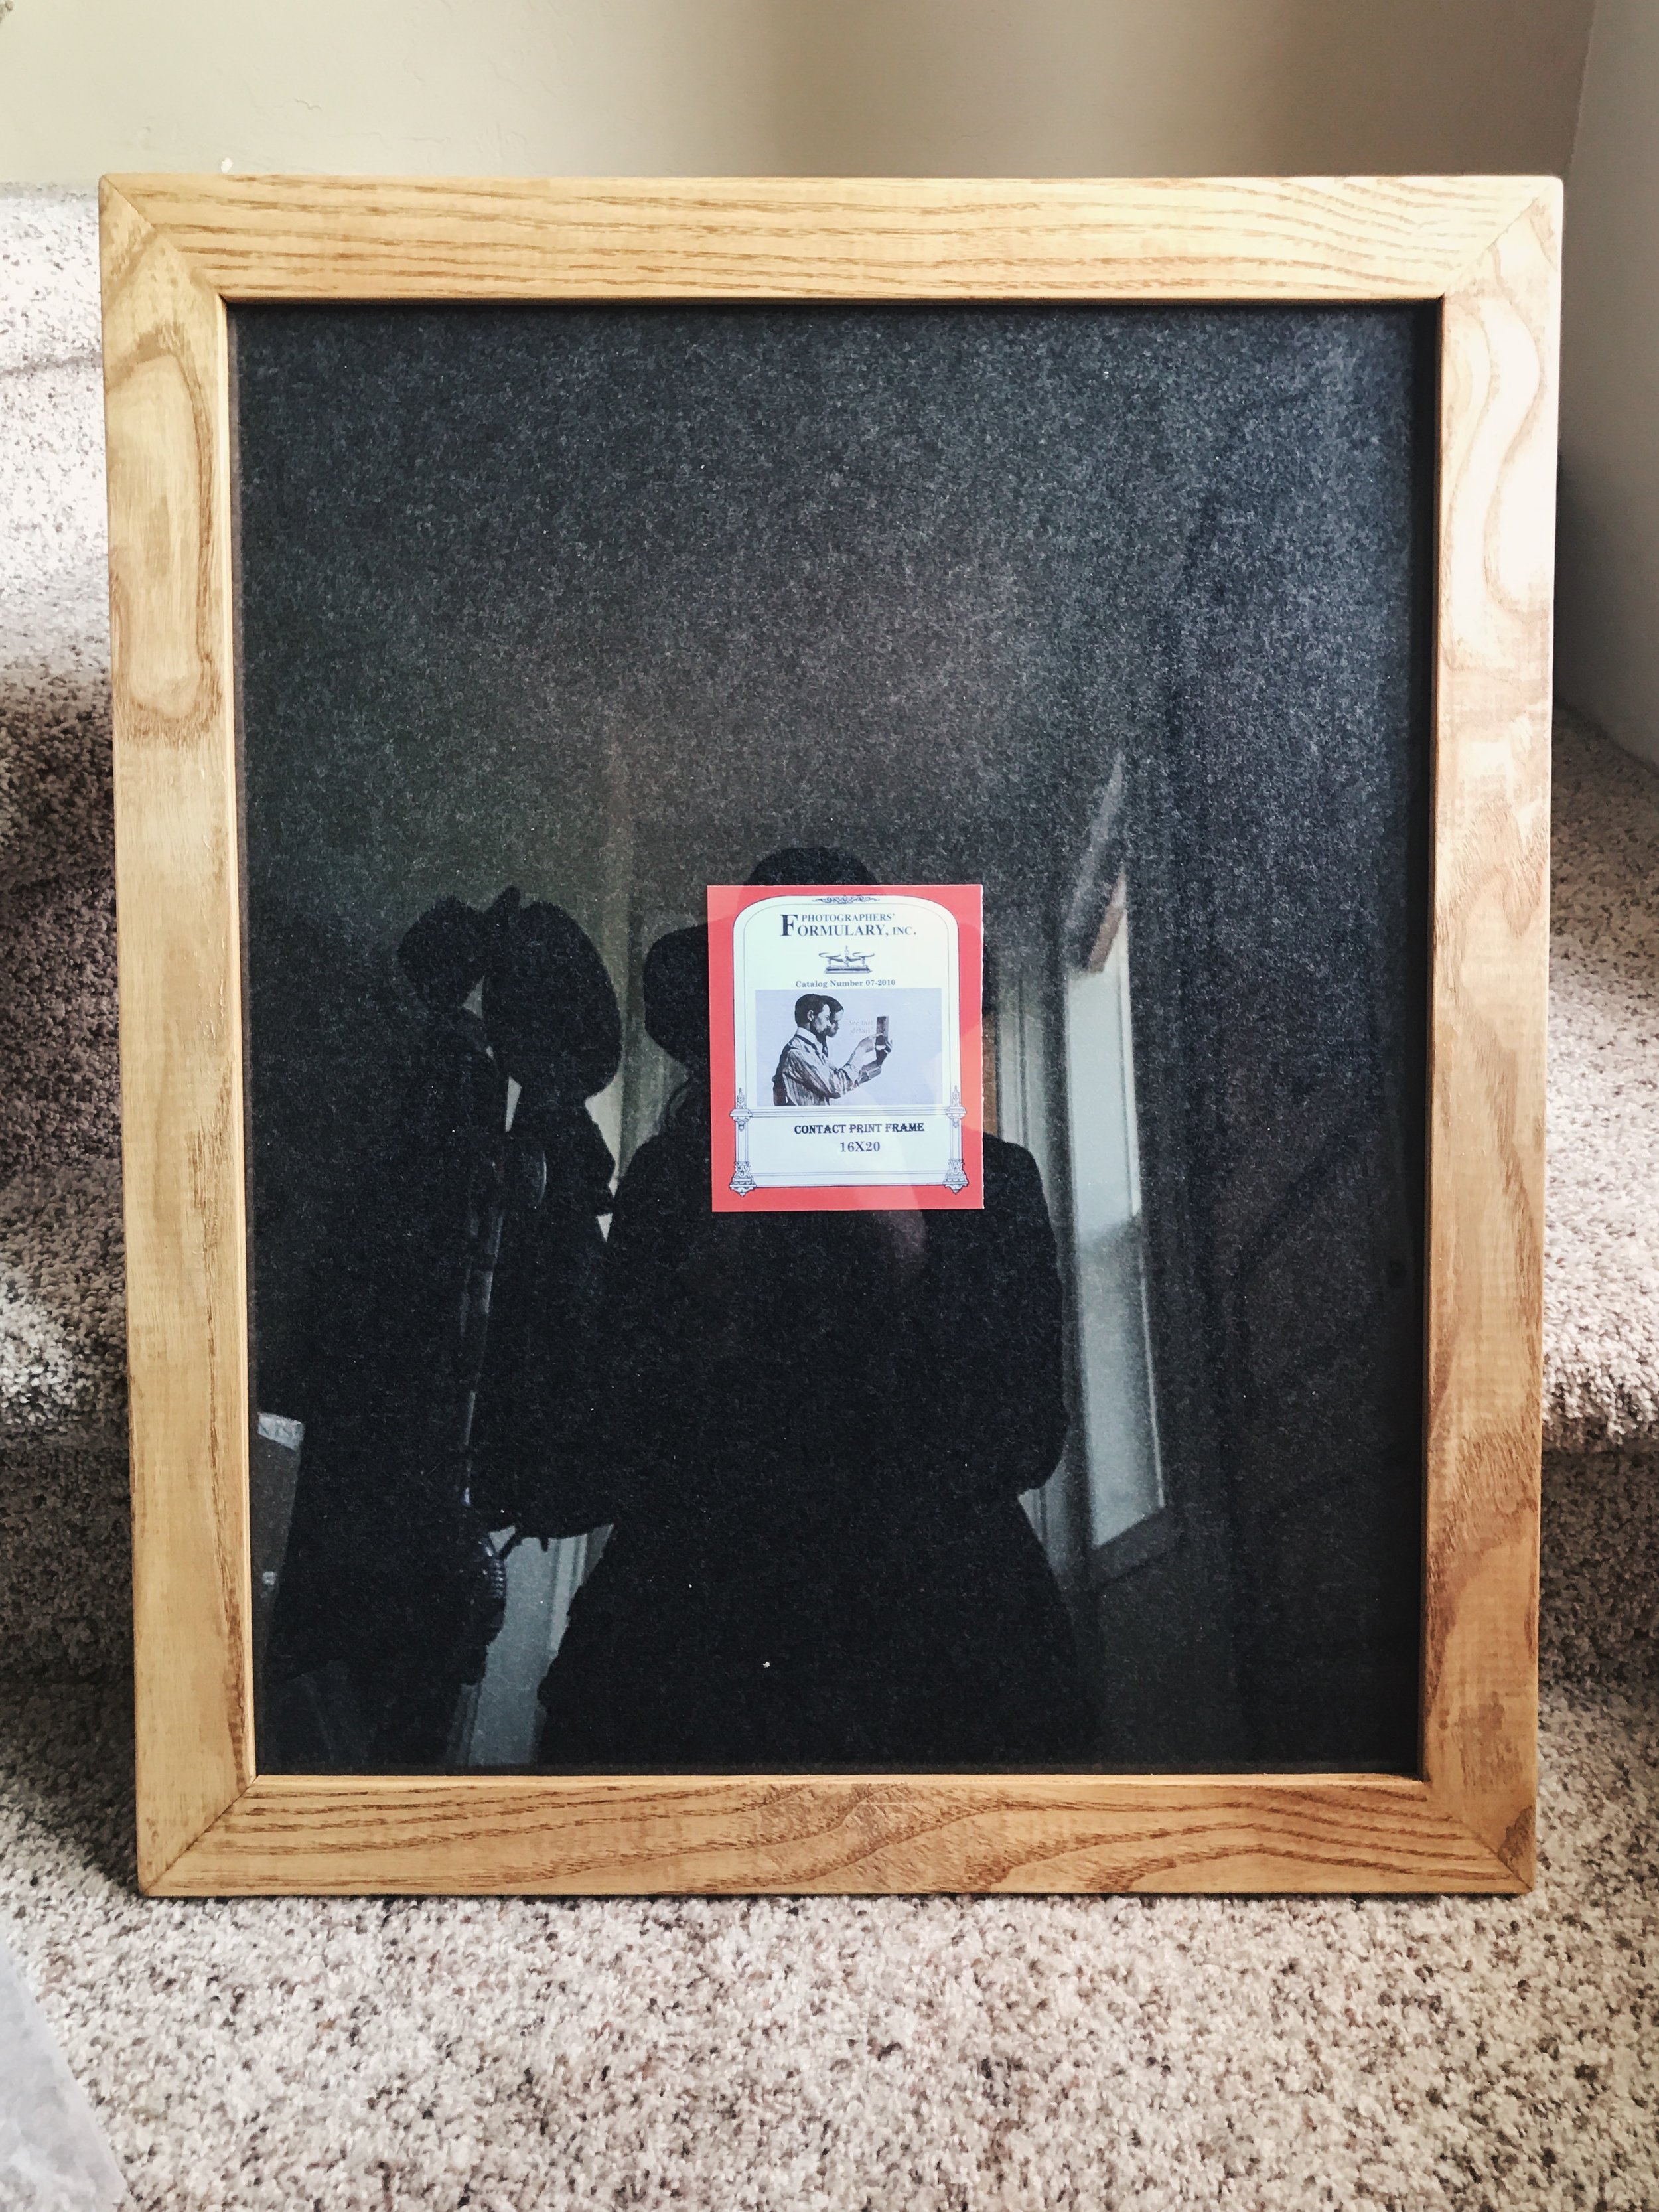

I bought my contact frame from the wonderful folks down at Photographer's Formulary. They have two different types of frames on their website: an economy frame and a swing arm frame. I bought a 16x20 economy frame for $92.25. Their 16x20 swing arm frame sells for $165. I've yet to use a print frame with clips instead of arms, but the price difference was enough for me to give it a go. The only other frame I've used is from Bostick & Sullivan— it's incredibly well-made and sturdy, but their 16x20 frame is $264.99 (I might have graduated, but that doesn't mean that the frugal art student in me disappeared).


The incredibly fun part about having your own workspace is that you can do whatever you want with it. I put my grandfather's chalkboard on the back corner counter (he used it to teach himself Spanish, I'll be using it for quick process and chemistry notes), and I found the cutest little retro toy refrigerator to use for small item storage— tape, pigment tubes, clothespins, etc. A light will be going in soon and my trays are supposed to arrive next week, so hopefully the first official print will come to be in the next few weeks.
on laminate and patience (and a project)
I'll start with this: I thought this project was coming to a close when I made my last post.
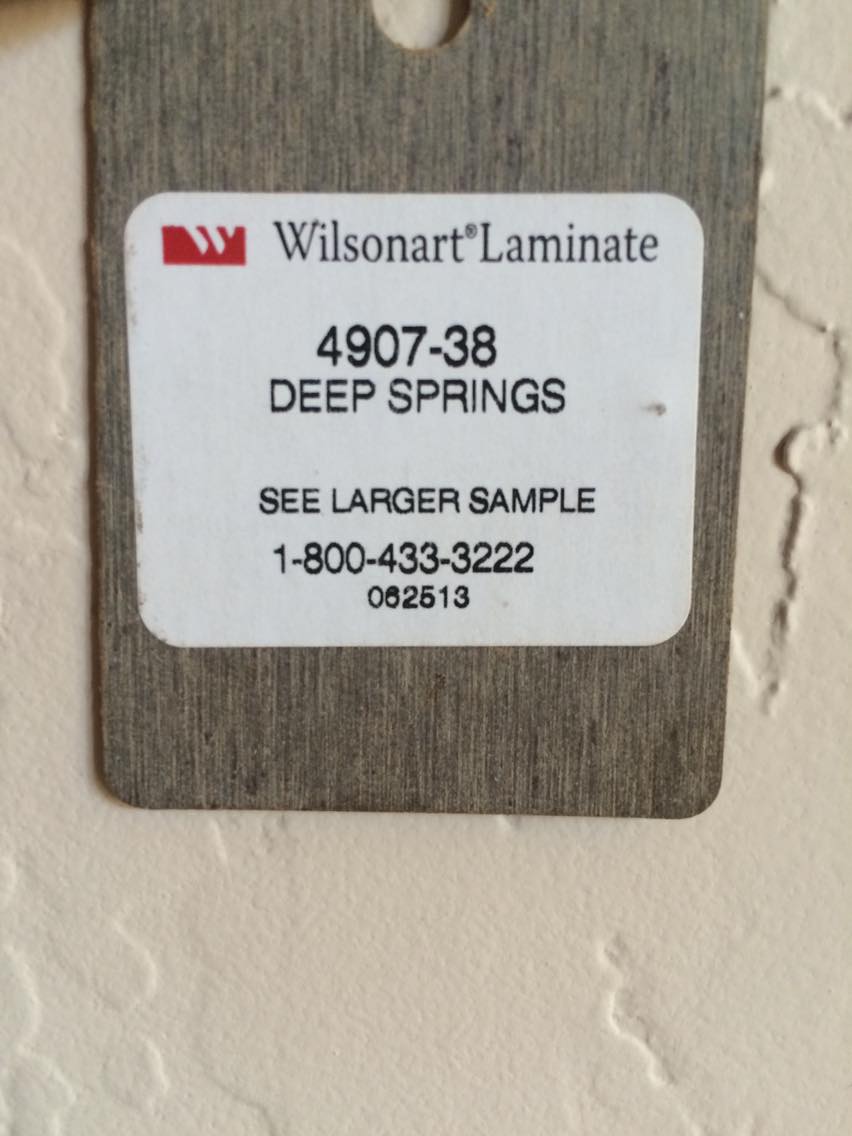
LAMINATE
I was asked to search for two 4'x8' sheets of laminate, which seemed easy enough. Practically every hardware store carries laminate tiles, so they should have laminate sheets, right?
I started out at Lowe's, which had hardly any laminate to begin with. After spending a couple minutes in their single bay of laminate, I left. Next was Home Depot, which had vinyl sheets, but they didn't have two rolls of darker colors. They did have a wide variety of laminate sheets online, but it's best to see it in person and shipping sounded like it would take almost two weeks. I called Western Building Center the next day (surprise, they don't have anything either), but they sent me to Cost Less Carpet, which is a local flooring store. They had 4'x8' sheets of laminate at their Spokane store, so the product still had to be shipped, but it only took a few days instead of a few weeks. We also picked up a gallon of contact cement to adhere the laminate to the ulay.
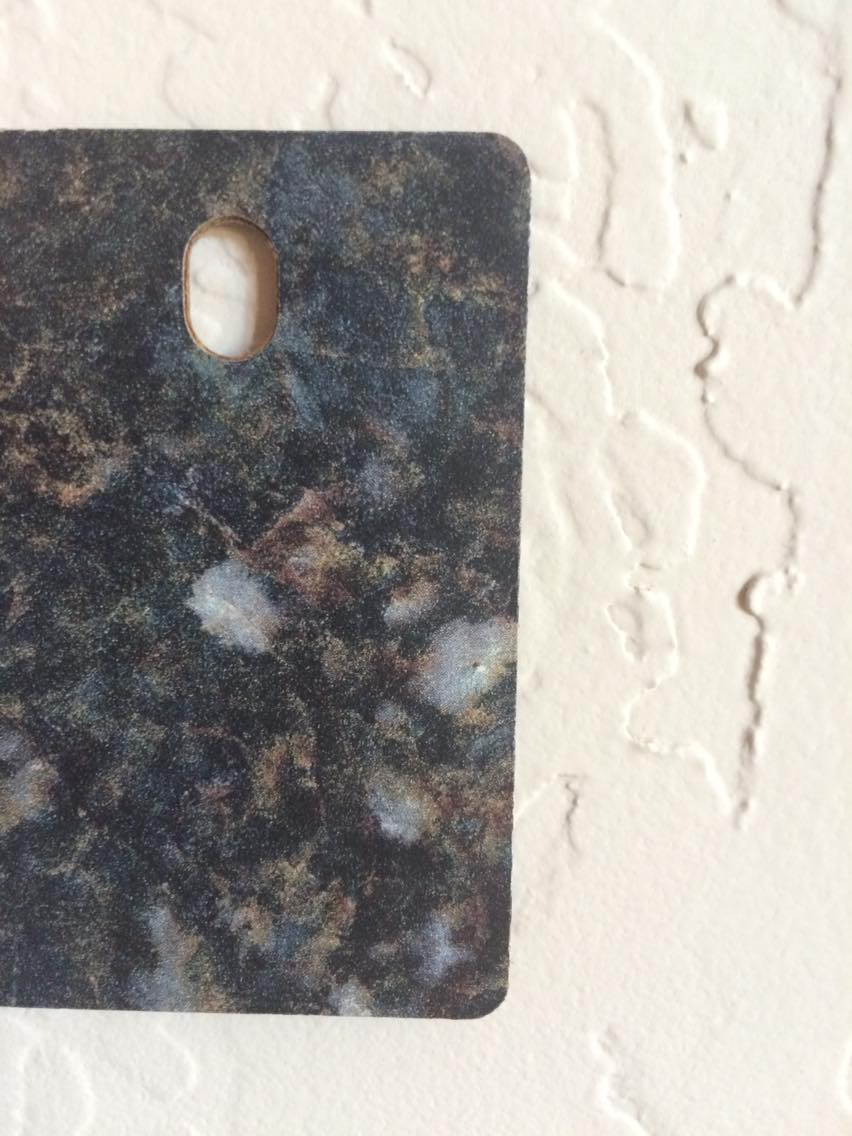
I chose a darker color in order to hide stains (lookin at you, silver nitrate).
PATIENCE
Everything seemed to be going well. We picked up the laminate and the adhesive today, which were both placed in the back of the truck. Fast forward a few hours. I happened to pass by the truck, and I noticed that something odd was oozing out of it. Lo and behold, the lid on the contact adhesive either popped off or the can burst, causing it to slop an entire gallon on the truck bed and drip down to the driveway below. I would like to say that there's a moral to all of this, but there isn't. Also, if you happen to spill a small amount of contact cement, mineral spirits on a rag will clean it up. We're still in the process of figuring out how you clean up a gallon's worth.

The adhesive managed to get on three tie-downs, a mattress pad, a chain, and the laminate box.

Note the smashed lip of the can, which could be why the lid popped off.

To put it simply, it works.
and A PROJECT
After calling the warehouse where we got the adhesive from and attempting to clean up the mess (which is currently rendered impossible), my mom and I switched to something less troublesome. This is where more of my DIY side comes in– this process has made me realize that my version of DIY might be closer to 'design it yourself.' My mom spotted this chair at a vintage sale for $15, and while neon 70s orange isn't my favorite color, it looked like it was practically brand new. The best part of this project is that it didn't cost anything in materials, but I did snap a screwdriver in half in the process of removing staples.
So, I don't have counters quite yet and there's a pool of cement adhesive in the bed of the truck, but I have a place to sit and imagine the completed darkroom and a clean truck.
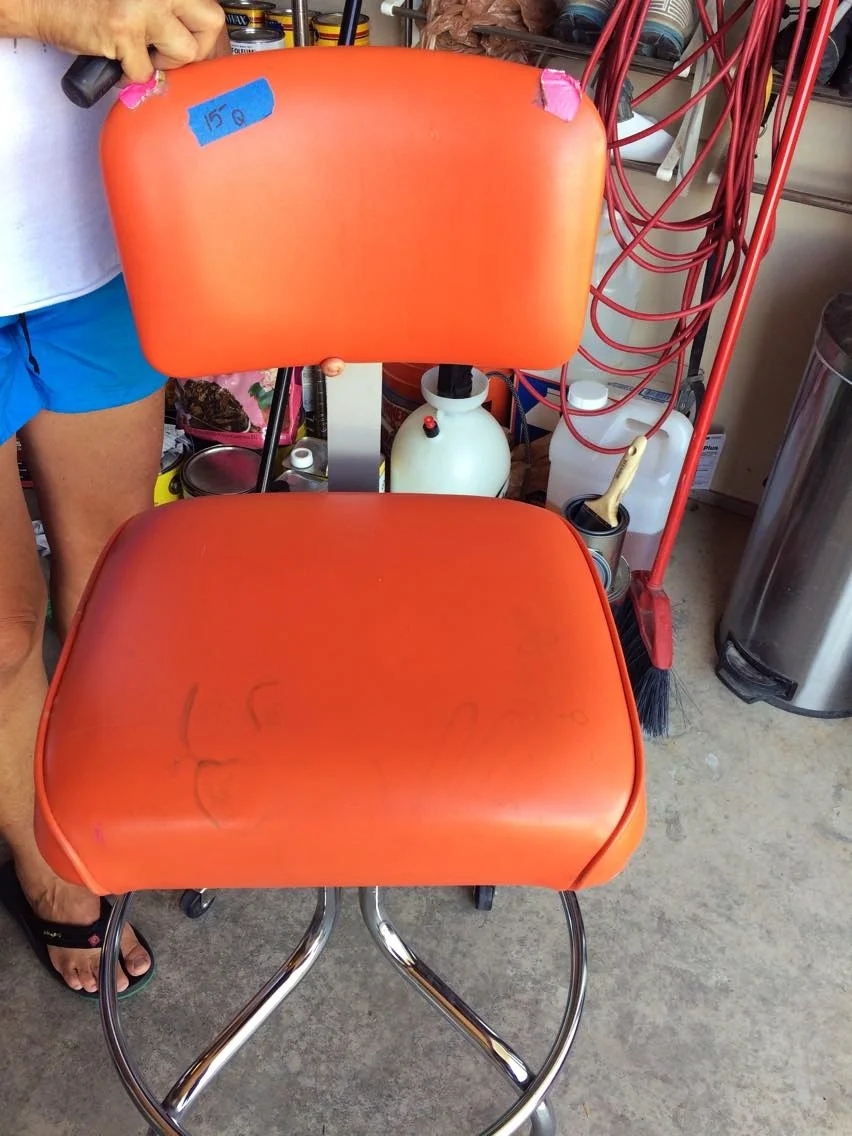
1973 orange, complete with pink duct tape and various faded stamps on the seat.

A significantly more subtle nod to the 70s.
counters
JULY 19, 2016
The end is in sight! Today is the day that my darkroom will actually start to look like a darkroom. However, that's easier said than done (here we go again).
Here are the original plans I had for the darkroom. It made sense in my head— three items (an enlarger, a sink, and a counter), three walls. We bought lumber according to this plan.
Plan 1, which for some reason included putting the sink on castors. I remember coming up with this idea and thinking that it was so clever. Hindsight is always 20/20.
(Note: the darkroom, while little, is not 8 inches by 12 inches).
LUMBER
- 4 4"x" 12' fir & larch (while pine is a cheaper option, fir & larch is known for being more sturdy and easier to stain)
- 3 ¼" underlay plywood (ulay for short)
- 3 ½" ulay
- 20 2"x4" 8'

The haul from the hardware store.

The original enlarger counter, which would make a nice portable bar.
We did a rough measurement, and despite my awareness of the standard counter being 36" tall, I decided that 40" would be a good height for the enlarger table (why, Megan? I often ask myself, but since I'm indecisive I always answer "I don't know").
Now, the enlarger I have is an Omega Condenser Head enlarger, which stands at 54" tall in total. With this in mind I still decided that a 40" tall table was okay. This put the top of the enlarger at 7'8", a whopping 2'4" taller than I am. In short, have a cup of coffee before you take measurements, or follow the age old "measure twice, cut once" (or just listen to the handyman who knows a lot more about construction than you do).
Our handyman built it that way per my request. He was pretty happy when I realized that he was right all along, and so we switched to a plan he came up with. My original three-counter, space wasting idea was traded for a counter surround that would give me an insane amount of counter space.

Plan 2, which includes a 'U' counter and a workable enlarger height.
(Note: some people are talented enough to make the same mistake twice.)
One of the great things about the new plan is that it uses significantly less lumber, which means putting some bills back in your pocket (think of me as your bumbling guinea pig for this project— I'm running on one of those hamster wheels thinking I'm actually going somewhere and you're aware of the tank around you on a metaphysical level). Anyway, the point is that this is cheaper and more work/storage efficient.

The enlarger is now at a workable height of 32".

Our handyman notched the 2x4s under the sink by about an inch and it fits perfectly. Also, I am officially in love with the amount of counter space. It's the little things in life.
ceilings & floors
JULY 16, 2016
My order for the day was to paint the floor, but, as you might have guessed, I got distracted. The shop was delivered with studs in the interior, minus the plywood floor. I, being a person who watches too much HGTV, decided to stain the studs on the ceiling. This seemed like a perfect plan– I would stain the beams and then paint the floor, so if a couple of drops of stain made their way down it wouldn't matter.
As I started to stain the first beam, I realized that this might have been a mistake. Here's a list of things to keep in mind:
- If you've insulated your darkroom, it will be warm, especially during the heat of the day
- A 4' ladder might not be tall enough to reach the peak of the ceiling, especially if you're 5'4"
- Beams have three sides
I stained as many of the beams as space would allow (about 5), which took roughly 4-5 hours. This would have been much faster if I was A) taller, or B) able to think of walking back to the garage to get a 6' ladder.
On the bright side, painting about 96 square feet of flooring seemed like nothing after standing on tiptoes on a ladder. For the floors I used an oil-based porch paint by Valspar. Try as I might, I am not always a tidy person, therefore the floors could not stay bare. The best and cheapest tool I've found for painting a floor is a Handi Painter. At less than $2, this is probably the cheapest part of the whole process.
Pre paint and stain
Half a beam in. I originally thought I could get away with not staining those triangular plywood pieces, but (surprise) I was wrong.
Mostly done
having an exterior darkroom
MID JUNE, 2016
Once I had caught up on sleep after my trip to Peru, I was eager to get to work. Of course, with life being the way it is, I did not jump out of bed after arriving well past midnight to sort out my darkroom.
About a week after I got home, I gave myself a designated darkroom day. The goal was to clean off start staining the outside. As I eagerly opened the doors to my little darkroom, I was greeted by a host of earwigs (an important thing to know at this point is that I am not, by any means, a bug person, especially concerning the slithering, tiny scorpion monsters that are earwigs). My initial reaction was to slam the door shut, which I did, but that doesn't make an earwig colony disappear. I spent the next 20 minutes or so standing at the threshold with a gallon of bug killer, and I, Megan Crawford, managed to squish earwigs with sandals on (as opposed to the more defensive close-toed shoes).
The moral of the story, as there is a point to this, is that an outbuilding is going to have bugs in it from time to time. Just mentally prepare yourself for that, be it a spider making its home on the ceiling or a herd of earwigs living in the doors.
After the earwig debacle, I pulled out the can of stain (Cabot semi transparent stain in Cordovan Brown), and my mom and I proceeded to stain two walls over 5 hours. Staining the exterior might not be entirely necessary, but that all depends on where you live. In Montana we get all four seasons, sometimes all within one day, so I wanted to be sure that the walls would last and weather well. You could also simply seal the walls with a spar urethane, but I seem to be good at making projects more complicated than they need to be.
interior finishes
EARLY JUNE, 2016
I was eagerly awaiting the arrival of my little darkroom (you can't do much when the building itself isn't there), and, how all things seems to go, the building arrived the day after I left to travel for 15 days.
While I was hopping between states and countries, my family's handyman, Joe Leone, insulated the walls and installed the tongue and groove planks. I briefly thought that I wouldn't need insulation (which is a funny thought in Montana, where snow is definitely a common thing in the winter). This would be the first of many initial ideas that were wrong.
We used a basic fiberglass insulation in between the studs, and all of the tongue and groove, which we got at a considerable discount, was from RBM Lumber.
So, as this project is panning out, it's becoming not as DIY as I initially envisioned. Traveling is certainly part of that, but I'm also not too familiar with the building side of DIY, although I like to think I am.
the learning curve / the supplies
LATE MAY, 2016
What I've discovered so far: garage sales are perfect for supplying a dimroom. Now, your average sale won't have the "big" supplies (chemistry, a sink, miscellaneous lab supplies), but they will have things that are still necessary. Think of shelves, lighting, containers, things that could double as trays– you get the idea. They have the answers to all of the missing odds and ends.
THE SUPPLIES
- 8'x12' shop from the Shed Man (this is by far the biggest expense, but arguably one of the most important ones)
- laminate counter– a few bucks from a garage sale
- cat litter containers for water/chemistry storage– free from a garage sale

A laminate counter I found at a garage sale. Once I add legs, this will work as the dry side counter.

The plot where the shop will be placed
day one
MAY 2016
As a self-proclaimed DIY lady, I've decided to embark upon outfitting my own dimroom. The catch: put it together on a budget, and put it together without running water or a drainage system. I'll be posting updates to this page as the project progresses, from the cost of supplies to DIY plans. Here we go.
THE PLAN
Put together a workable dimroom on the fly (probably easier said than done. We'll find out).
I was originally planning on putting a dimroom together in a spare closet, but the ceiling of the closet I would have used follows the roofline, which severely limited the amount of workable space.